
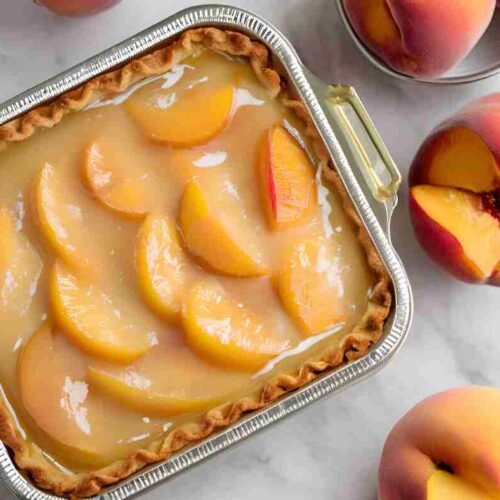
Peach Pie with Canned Peaches
A great dish that delivers the wonderful flavor of summer right on your table any time of year is peach pie using canned peaches. This traditional fruit pie blends the ease of canned peaches with the cosy warmth of handmade baking. Those who want a great peach dessert but lack fresh peaches or are pressed for time would find this to be the ideal alternative.
This post will walk you through developing a delicious peach pie using canned peaches. We’ll go over the key components, including granulated and turbinado sugars as choices. You’ll learn how to make the peach pie filling canned, put together and bake peach pie, and gain ideas on presenting and keeping peach pie. This simple peach pie with canned peaches is likely to become a favorite whether your experience level is that of a seasoned baker or first-time pie-making effort.
Ingredients for Canned Peach Pie
Making a great peach pie from canned peaches just only a few basic components. Let’s investigate the basic ingredients required for this delicious and consoling treat.
Canned peaches
Obviously, canned peaches are the highlight of this peach pie . They provide stability and ease so you may savor peach pie created with canned peaches whenever of year. Choose canned peaches packaged in juice instead of syrup to prevent a too sweet filling. Thoroughly draining canned peaches before use is crucial as extra liquid could runy the pie mixture. About 4 to 5 cups of canned peaches—roughly equal two 14.5-ounce cans—are needed for a basic 9-inch pie.
Pie crust
A nice crust marks a wonderful pie. For convenience or create your own from scratch; store-bought pie crust like Pillsbury pie dough is easy. Made from scratch, a crust calls for flour, chilled butter, salt, sugar, and ice water. Maintaining cool components and lightly touching the dough can help a flaky crust turn out. For a striking display, think about using a lattice pie crust. For exact directions, see a pie crust tutorial.
Sugar and spices
You will need to add depth to the taste and accentuate the inherent sweetness of the peaches by:
Granulated sugar or light brown sugar; ground cinnamon; ground nutmeg optional; vanilla essence; lemon juice.
Cinnamon and nutmeg provide warm, soothing overtones; the sugar sweetens the filling. Lemon juice sharpens the taste and balances the sweetness; vanilla extract improves the flavor.
Thickeners
You want a thickening agent to stop a runny filling. Usually available are:
All-purpose flour; cornstarch; instant clear jel
Popular because it produces a smooth texture without clouding the filling, cornstarch is The juiciness of your canned peaches may affect the quantity required; generally speaking, a 9-inch pie calls for around 1/3 cup.
Other essentials
Your peach pie canned peaches will call for some other ingredients to finish:
• Unsalted butter: Little cubes of butter give the filling depth. • Egg: To finish the crust golden-brown, use an egg wash. • Salt: A little accentuates every taste without becoming the pie salted.
Having these components on hand will help you to make a delicious peach pie with canned peaches. Any gathering will find a dessert created from sweet fruit, toasty spices, and buttery crust to be sure-to satisfy.
Preparing the Pie Filling
Making a great peach pie filling from tinned peaches is easy and produces a sweet and tasty outcome. This part will walk you through the processes to create the ideal canned peach pie filling for your handcrafted peach pie.
Draining and slicing peaches
First open the peach cans and pour the extra juice into a saucepan. Put the peaches aside for now in their cans. Eliminating as much moisture as you can help to avoid a soggy pie crust. Before using frozen peaches, make sure sure they are completely thawed and drain any extra liquid.
Mixing with sugar and spices
Combine in a big bowl the drained peaches with brown sugar, granulated sugar, cinnamon, and a little of salt. A little nutmeg and vanilla essence can provide additional depth of taste. Till the peaches are uniformly covered with the sugar and spices, gently stir these components. This stage helps the flavors to mix together and improves the pie’s whole taste.
Adding thickeners
Add a thickening agent if you want the consistency of your peach pie filling canned just so. Popular option is cornstach as it produces a velvety texture without clouding the filling. Using around one to two teaspoons of cornstarch, for every four cups of sliced peaches Before sprinkle the cornstarch over the peaches, mix it with a little sugar; then, toss to coat consistently. Let the mixture settle for around fifteen minutes before moving on.
Cooking the filling
Cooking the filling comes now. Combine the peach nectar you reserved previously with the sugar, cornstarch, and a little butter in a medium pot. Over medium heat, continually stirring, this liquid thickens and becomes frothy. Usually, this procedure takes five to eight minutes. Remove the pan from the heat once thickened and gently fold in the spiced peaches and any leftover bowl juices.
Cooling before use
Before putting the filling in your pie, let it cool completely after cooking. This chilling time stops a runny pie and lets the filling set correctly. Stressing the filling in a shallow dish and refrigeration can help you hasten this procedure. Your peach pie filling from canned peaches is ready for use in your preferred peach pie once cold.
These guidelines will help you produce a wonderful peach pie filling from a can fit for your handcrafted peach pie. Sweet peaches, spicy spices, and a properly thickened consistency taken together will create a delectable dessert guaranteed to wow.
Assembling and Baking the Pie
Preparing the pie crust
Start by getting ready the peach pie with canned peaches and pillbury pie dough. Just lay the bottom crust of a store-bought pie crust into a 9-inch pie pan. Get the ingredients—flour, cold cubed butter, salt, sugar, and ice water—for those who want handmade crust. Work the butter into the flour with a pastry blender or fork until it resembles coarse dish. Add sugar and salt; then, gradually add cold water until the dough comes together. Two balls from the dough should be divided, wrapped in plastic, and refrigerated for minimum three hours.
Adding the filling
It comes time to add the canned peach pie filling when the dough is done. Make sure the prepared filling is uniformly distributed when you place it into the bottom crust. Dot little bits of butter over the top of the filling for additional richness. This stage improves taste and produces a more opulent texture in the final pie.
Creating a lattice top
A lattice pie crust would be a visually stunning peach pie worth considering. Roll out the second pie dough and cut it into 1/2 to 1 inch-width strips. Lay half of the strips across the pie in one direction; use shorter strips for the sides and longer ones for the middle. Reverse every other strip then put a perpendicular strip across. Proceed similarly, weaving lattice top to form a lattice design. Crimp to seal, then cut any extra dough around the edges.
Egg wash and sugar sprinkle
Egg wash will help the top crust have a lovely golden-brown gloss. Whisk one egg with a tablespoon of milk or water, then softly brush this mixture over the lattice and crust margins. Over the egg-washed crust, scatter turbinado or granulated sugar for extra shine and sweetness.
Baking instructions
Set the oven for 425°F (218°C). To catch any possible overflow, lay the completed peach pie canned peaches on a baking sheet. To aid to solidify the crust, bake the pie at this high temperature for twenty minutes. Then lower the temperature to 375°F (190°C) and keep baking peach pie for 45 to 50 minutes without opening the oven. The pie’s done when the crust is golden brown and the filling bubbles. The interior temperature of the filling should reach around 200°F (93°C) one for exact doneness.
Take out of the oven once cooked and set on a cooling rack. Let it chill for minimum four hours before cutting and presenting. This chilling phase is really vital because it lets the filling set correctly and guarantees fresh slices when presented.
Following these guidelines will produce a wonderful peach pie using canned peaches that will wow with its golden-brown lattice pie crust and exactly set filling. This quick peach pie with canned peaches is a wonderful treat for any occasion because of its flaky crust, delicious peach pie filling canned, and scent of toasty spices.
Serving and Storing Your Peach Pie
Cooling time
Before serving peach pie, it is essential to let it cool completely after baking. The filling needs this cooling time to solidify well and guarantees fresh slices upon presentation. Arrange the heated pie on a cooling rack and let it cool room temperature at least 4 to 5 hours. Chilling your peach pie created from canned peaches in the refrigerator for two hours before serving can provide even better results. This additional chilling time will help to improve the pie’s general texture and ease cutting.
Serving suggestions
It’s time to savor this delicious treat after your peach pie canned peaches cools. For optimal taste and texture, present the pie room temperature. Think of toping your peach pie with a dab of whipped cream or a scoop of vanilla ice cream to improve its taste. These creamy ingredients fit the sweet and sour taste of the canned peach pie filling exactly. Cool Whip Dip is another great accompaniment for a more decadent dessert.
Storage tips
Stow any leftovers in an airtight container in the refrigerator to preserve your peach pie using canned peaches fresh. Your peach pie can keep fresh for up to three days if properly refrigerated. The pie can safely sit out on the counter for up to two days if you would like it at room temperature. To keep it fresher, just cover it with plastic wrap, aluminum foil, or a pie pan lid.
Reheating methods
You may reheat your peach pie canned peaches in many ways if you would like to enjoy them warm. One approach is to reheat separate pieces in the oven for around fifteen minutes at 350°F. An air fryer is a faster choice. Air fried for five minutes at 300°F on a slice set in an oven-safe dish. These warming techniques will bring back the pie’s warmth without sacrificing its texture.
Freezing instructions
Frozen peach pie made with canned peaches lets you savor this great treat for much longer. First let a cooked peach pie cool completely before freezing it. After that, securely cover the pie with a couple layers of plastic wrap then a layer of aluminum foil. Peach pie frozen correctly can keep for up to three months.
Remove a frozen peach pie canned peaches from the freezer and refrigerate overnight or as least for at least 12 hours before serving. Should you be pressed for time, you may defrost the pie at room temperature for four to five hours; however, be advised that this approach may produce a somewhat softer crust owing to condensation.
The thawed pie may be served room temperature or reheated in the oven when you’re ready. Preheat the oven to 350°F, remove the plastic wrap, then set the pie on a baking pan to warm. If refrigerated, gently cover the top of pies with crust tops with foil and bake for approximately 25 minutes; if frozen, bake for 35 minutes. Bake pies with crumb topping 25 to 35 minutes, covering the top with foil should it start to brown .
Whether you’re serving fresh from the oven or enjoying leftovers days later, following these serving peach pie and storage peach pie recommendations will help you to make sure your peach pie using canned peaches stays tasty and appealing.
Conclusion
A great dish available all year long is peach pie made with canned peaches. Perfect for any circumstance, sweet, juicy peaches combined with toasty spices and a flaky crust make a consoling treat. Home chefs will find this simple peach pie with canned peaches to be a flexible choice as it lets bakers of all ability create a delicious dessert without using fresh peaches against canned peaches.
From cooking the canned peach pie filling to building and baking peach pie, every step helps to produce an unforgettable dessert. Whether refrigerating or freezing peach pie, the adaptability in storage guarantees that you will always be able to enjoy this delicious dessert whenever a hunger comes. Therefore, keep in mind that great peach pie is only a can opener away next time you’re in the need for a piece of summer regardless of the season.
FAQs
- Can I bake using canned peaches instead of fresh ones? Indeed, in baking you may use frozen or canned peaches for fresh ones. Whether you are creating a great peach cobbler or a peach pie, follow certain rules to guarantee the greatest outcomes.
- How do people usually make pie filling from canned peaches? Heat the canned peaches in a saucepan with their liquid to create peach pie filling. Using a cornstarch slurry, thicken the mixture; add spices for taste such as cinnamon or nutmeg. Before using the mixture as canned peach pie filling, let it totally cool.
- How may I stop my peach pie from being very runny? To thicken the pie juices, use cornstarch; this helps to avoid a run-through pie. Including fresh lemon juice improves the taste of the fruit and controls consistency.
- Should I make a cobbler using frozen or canned peaches? Freezed peaches are better for cobblers. Thaw, cut, then wipe them dry for use. Generally overly soft and mushy, canned peaches are not the best choice for peach cobbler.
Peach Pie With Canned Peaches
Ingredients
- For the Pie Crust:
- 2 ½ cups all-purpose flour
- 1 cup unsalted butter cold, cut into cubes
- 1 teaspoon salt
- 1 teaspoon sugar
- 6-8 tablespoons ice-cold water
- Alternatively you can use store-bought pie crust for convenience.
- For the Peach Filling:
- 2 cans 15-16 oz each sliced peaches (drained)
- ¾ cup granulated sugar adjust to taste depending on the sweetness of the canned peaches
- 2 tablespoons cornstarch for thickening
- ½ teaspoon ground cinnamon
- ¼ teaspoon ground nutmeg optional
- 1 tablespoon lemon juice
- 1 teaspoon vanilla extract
- 1 tablespoon unsalted butter cut into small pieces
- For the Egg Wash:
- 1 egg beaten
- 1 tablespoon milk
Instructions
- Prepare the Pie Crust:
- In a large bowl, combine flour, salt, and sugar.
- Cut in the cold butter using a pastry cutter or fork until the mixture resembles coarse crumbs.
- Slowly add ice-cold water, one tablespoon at a time, and mix until the dough starts to come together.
- Divide the dough into two equal portions, flatten into discs, wrap in plastic wrap, and refrigerate for at least 1 hour.
- Prepare the Peach Filling:
- Drain the canned peaches and slice them if they are in halves.
- In a large bowl, mix together the peaches, sugar, cornstarch, cinnamon, nutmeg (if using), lemon juice, and vanilla extract. Stir well until everything is combined.
- Roll Out the Pie Dough:
- Preheat your oven to 400°F (200°C).
- Roll out one of the chilled dough discs on a lightly floured surface to about 1/8-inch thickness.
- Carefully transfer the dough to a 9-inch pie dish, trimming any excess dough around the edges.
- Pour the peach filling into the prepared pie crust, and dot the top with small pieces of butter.
- Top the Pie:
- Roll out the second disc of dough for the top crust. You can either lay it flat over the pie or create a lattice design by cutting strips.
- Seal the edges of the pie and trim any excess. If using a flat top crust, make a few slits to allow steam to escape.
- Add the Egg Wash:
- In a small bowl, mix the beaten egg with milk.
- Brush the egg wash over the top of the pie for a golden, shiny finish.
- Bake the Pie:
- Bake the pie in the preheated oven for 40-45 minutes, or until the crust is golden brown and the filling is bubbling.
- If the crust browns too quickly, cover the edges with aluminum foil.
- Cool and Serve:
- Allow the pie to cool for at least 2 hours before slicing. This will help the filling set properly.
- Serve with whipped cream or vanilla ice cream, if desired.
Notes
Peach Pie Serving Information
- Servings: 8 slices
- Portion Size: 1 slice (based on a standard 9-inch pie)
Serving Suggestions:
- Serve warm or at room temperature.
- Pair with a scoop of vanilla ice cream, whipped cream, or a drizzle of caramel sauce.
- For added texture, garnish with chopped nuts or a sprinkle of cinnamon sugar.
Estimated Nutritional Information (per slice):
- Calories: ~300-350 kcal (depends on the type of crust and amount of sugar)
- Fat: 15-20g (varies by crust, especially if using butter-based dough)
- Carbohydrates: 40-50g
- Protein: 2-4g
- Sugars: 20-25g
- Fiber: 1-2g